Stop Motion Animator, Illustrator, Painter, and Musician based in LA.
If you want work done, such as commissions, or you just wanna chat, feel free to shoot me an email at stop.rob.sassi@gmail.com or stay updated on new work with twitter @StopRobSassi.
DISCLAIMER (Copyright): None of the art on my blog can be used or reproduced without permission from me.
I had some creative ideas that I tried to execute during #StopMotionSeptember. While I was using Modibots figures for most of them, I did end up building a few fun puppets in the process. Regardless of the outcome, they all brought a learning experience.
Above is a simple paper puppet I made for the day theme "Float." I wasn't entirely satisfied with how the animation ended up turning out. Maybe one day I will re-shoot it.
One of the days theme was "Fly" and I really enjoyed the crow puppets I built years back when I did the "Byrd VS Gravity" short film. This little guy was inspired from that part of my brain. ;)
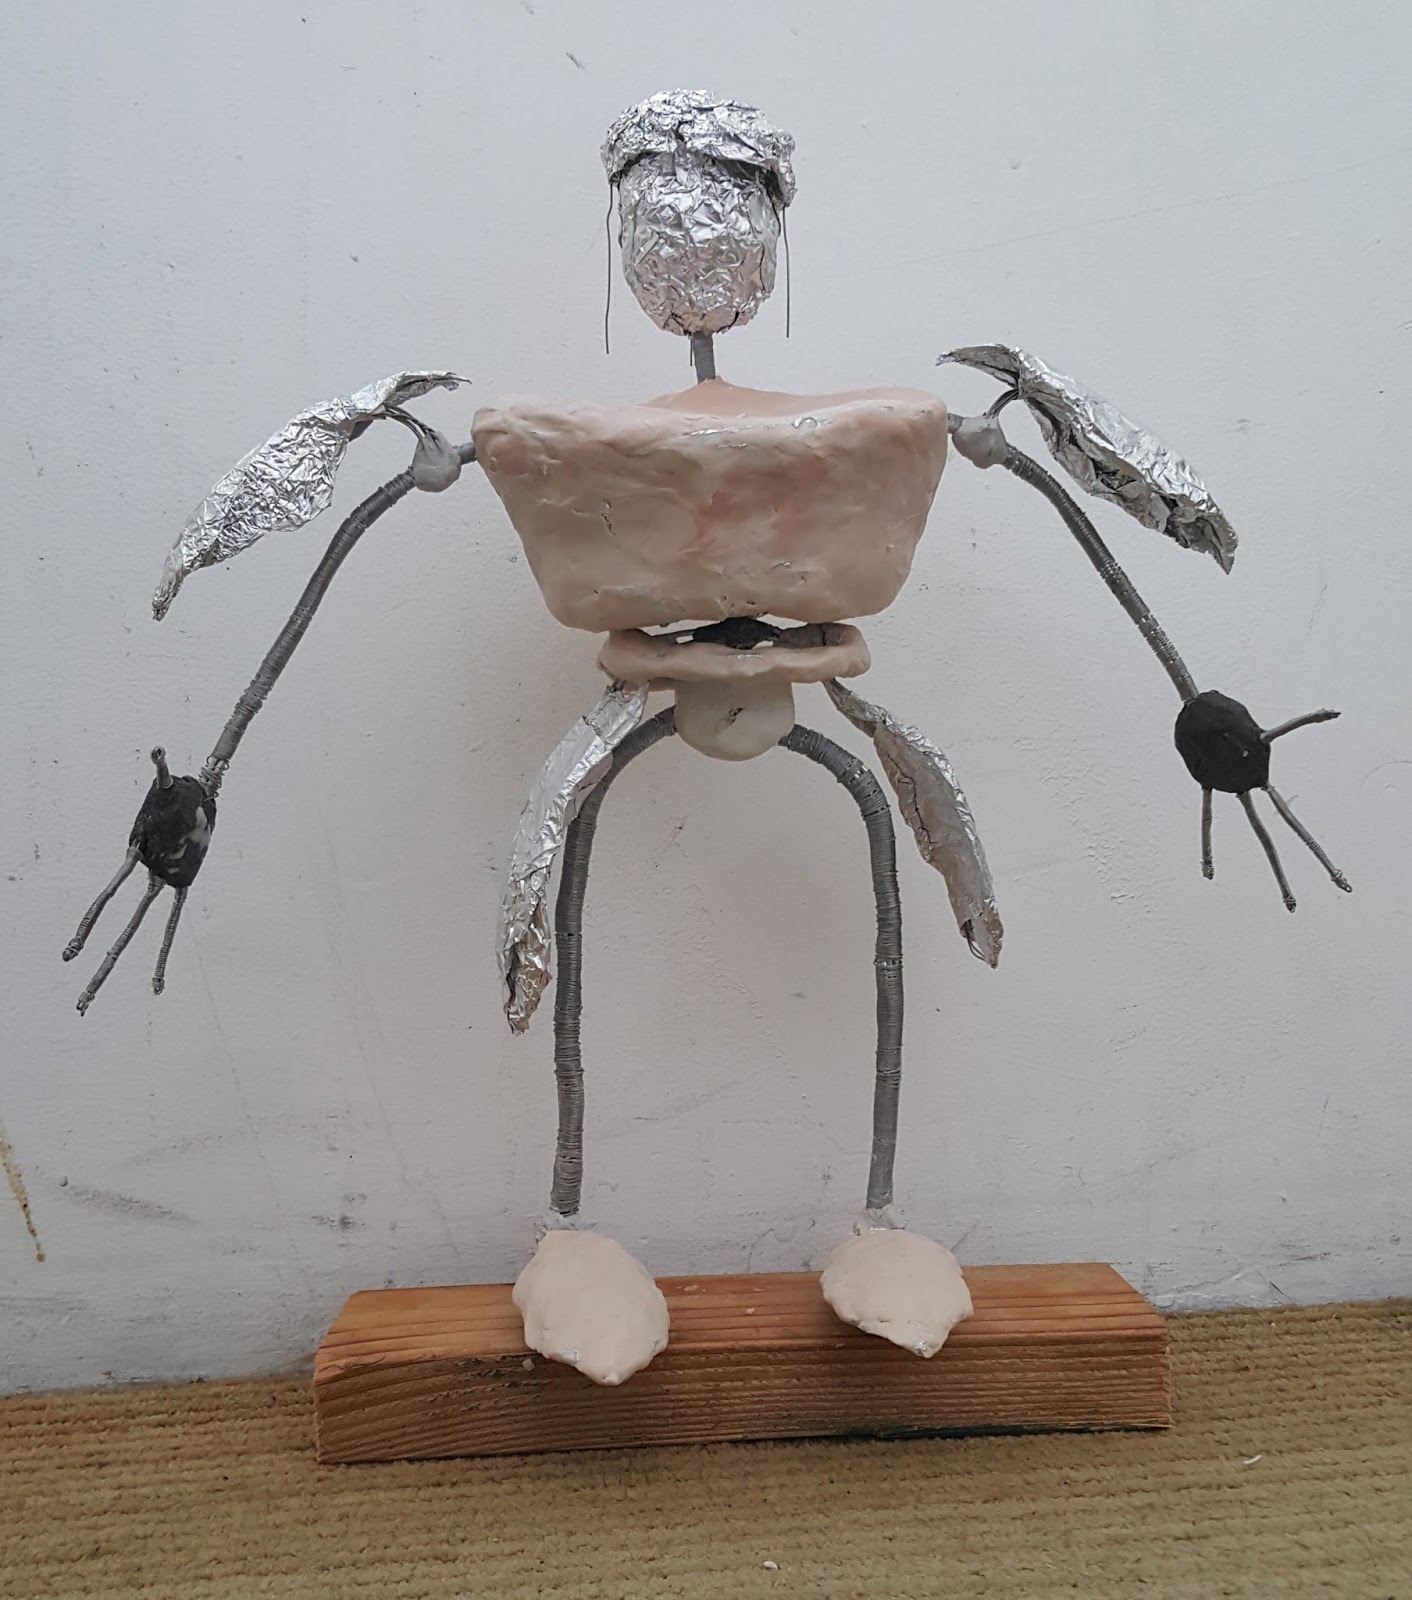
Above are a few different angles of the initial armature I built. I simply used coiled aluminum wire and epoxy for the main skeleton. Following that, I built out a lot of the hollow areas with aluminum foil, so it could be light and easier for me to add a coat of Sculpey.
So I caught the tail-end of a monthly animation challenge that happened last month called #StopMotionSeptember and I wanted to share a compilation of the tests I did for the month.
The idea behind it was that you had a day to complete an animation that included the theme of the day. An example of a theme would be the action to swing, walk, or lift .
I had fun and plan to connect back to stop animation in the near future.
Hello wandering eyes, it's been a bit since I've posted. Today though, I am sharing a recent experiment I did over the past couple months in my free time.
I am finally getting settled in LA, and I decided it's been way too long since I've built anything. Currently, I am lacking any real space to build a stage and animate, but I am going to try to figure that out here soon. Besides that little barrier, let me introduce my initial sketch I had for this character.
I guess the general idea, is that he is some sword of squire or page. Whenever I have the opportunity to build a small stage and animate, I was hoping to emulate a few fun RPG-estc animations. On top of all of that, I wanted to try a new process for building the armature.
Instead of coiling the aluminum wire, like I have in all my previous puppets, I am actually coiling a smaller wire around strands of wire that are bunched together. As you can see here, I have 4 bent wire here that I will adhesive together for the spine before I wrapped the wire around it. And as you can see below, I have the final product laid out.
Very tedious stuff, but I anticipate that this will be stronger than my previous approach. The puppets I build have a certain lifespan. Whenever you bend aluminum, it already weakens. By the old coiling method I used, I was already weakening my armature before I used it. Hopefully, by bunching the wire together this way, it will improve the lifespan of the puppet. Below, I epoxied the end of the exposed wire to create a 'base' for the head.
Now I am pretty much doing the same thing with the wire for all of the legs and arms. Usually, I try to use long strands and bend those, as opposed to cutting a bunch of strands. This way, I am also creating more stability. Over and under, I wrapped the "torso" with the soon to be legs. I then epoxied that ball of strands.
Rinse and repeat the same concept for the arms
as well. And now I will use a smaller gauge wire for the hands.
Now that I have the basic idea for the armature all composited, with tie-down feet, I will now be building out the shape with more strands of wire, aluminum foil, and sculpi! Above is a snapshot of my workstation before I dig into the task ahead.
As you can see in the previous images, I used the wire to shape the armor for the swordsman, and then bulked out the hollow part with aluminum foil (so the puppet doesn't weigh so much).
Since moving out here, I haven't been able to really use my sculpi in a fashionable time frame. Because of this, I had some sculpi that had dried out and it was very brittle. In the above image, you can see me rejuvenating it back to life with some baby oil! Cheap and effective!
This part took some time because the nature of the beast when working with sculpi. I prepared a rough sculpt to get ready for baking.
Getting more detail work in...
Below I am about the bake him!
Getting a first coat of paint down after the successful bake.
Adding some detail with black acrylic... And below I have added a bit of cloth on the wire that is extended by his helm. I was hoping to get a little overlapping action by it!
And voilà! After some time, I have my final product. I also compiled a sword out of Styrofoam that my roommate had lying around. It seems like the bending aspect of the puppet is working just how I intended so far, as well! Hopefully sooner than later, I can work on some animation tests with this guy. I feel like I learned a lot and even though I wish I performed certain tasks differently, I think I will be able to get a few nice simple animations out of this guy!
Thanks for tuning in! :)
Hey there! I'm just going to plug my current reel here and break it down (very) briefly below.
Hope you enjoy! Feel free to contact me about any jobs you would like to collaborate on or perform for you. Reel Breakdown: Essentially, everything in my current reel are all projects that I directed, produced, edited, composited and built from the ground up. The only shots in my reel where I only did the animation, are the shots that include the 'mad scientist' from the music video I worked on "Baby It's You!"
So I recently finished up a new animated short I call, "Reverie."
This actually started out as an acting exercise... (as most of my projects do...) and I decided to just keep animating until I got bored. Unfortunately, I had to stop animating abrupting because I recently relocated from Pittsburgh to Los Angeles.
Oh god, don't even get me started on how much my laptop, that I had to use to shoot on, kept giving me problems throughout the whole shoot. I swear, I can't get a break when it comes to technology and having to wing everything. It really build character consequently, so I'll take it.
I should probably consider building a motion graphic portfolio soon.
A video posted by Rob Sassi (@stoprobsassi) on
Above is a shot of the basement I was working in. It's a clutter! Wouldn't have been the wiser.
Finished my latest puppet! Now I can FINALLY start to do some animation with her! The stitching for the clothes took FOR-EEEVVVVVVERR… so glad I did it though…
Stay tuned for some animation tests in the near future!
SO... I started this puppet awhile ago, but finally got around to finishing it.
Here are a bunch of progress shots leading up to the final product!
It all started out with these design sketches.
As time went on though... I had a better concept for what this character would do, so I changed her clothing entirely.
But the next step was to plan the armature.
I made slight changes to the armature to be more practical with what materials I was working with. Also, I felt the hands itself needed to be larger so the pantomimes were easier to read.
Then I started to build out the form with aluminum foil, as well as added the placement for the wooden bead eyes.
Here, I have added the sculpy already and baked the puppet.
For this puppet, I wanted to try using latex, so there was no leftover armature wire to see.
I had to hot glue cotton balls in all the areas I wanted to cover, so the latex would stick.
Here is a shot from after the latex was applied. I tinted it with acrylic paint.
A picture showing the "hair" hot glued to the strands of armature wire.
I also had to make clothes for this puppet.
Above, I have stabled my fabric to a pattern I designed for my puppets underarmor/spandex.
Below are a couple pictures showing before and after the pattern was removed.
I ended up hot gluing the spandex layer to the body.
Now I had to work on the outer layer.
Started to sew the final headbands, sweatbands, and leg warmers.
And here we stop at my current process!
It still turned out a little rough, but I was more focused on making something I could animate with, while trying out a new process.
It should look good in motion!
Also, this isn't completeld yet. I am currently adding more detail as we speak!
I'm very excited to show you the final product and to start animating! Stay tuned.




_TURN.jpg)


